Introduction
In order for Gravity SMTP to send messages from your Microsoft 365 / Outlook account, you will need to create an application in Azure Portal and provide the plugin with a token. You must complete this step before configuring the Microsoft 365 / Outlook Integration within Gravity SMTP. This article outlines steps for creating a web app in your Azure Portal.
Prerequisites
- A Microsoft Azure account with a valid subscription.
- A Microsoft-based email address with email-sending permissions (Hotmail, Live, Outlook, Microsoft 365).
Step 1: Create an Azure Account
- Visit Azure Portal.
Open your browser and go to Azure Portal. - Sign In or Create an Account.
If you have an existing Microsoft email account, log in with your credentials. If you need to create a new account, sign up for a free Microsoft Azure account here.
Step 2: Create an Application In Microsoft Entra ID
- Open Azure Portal.
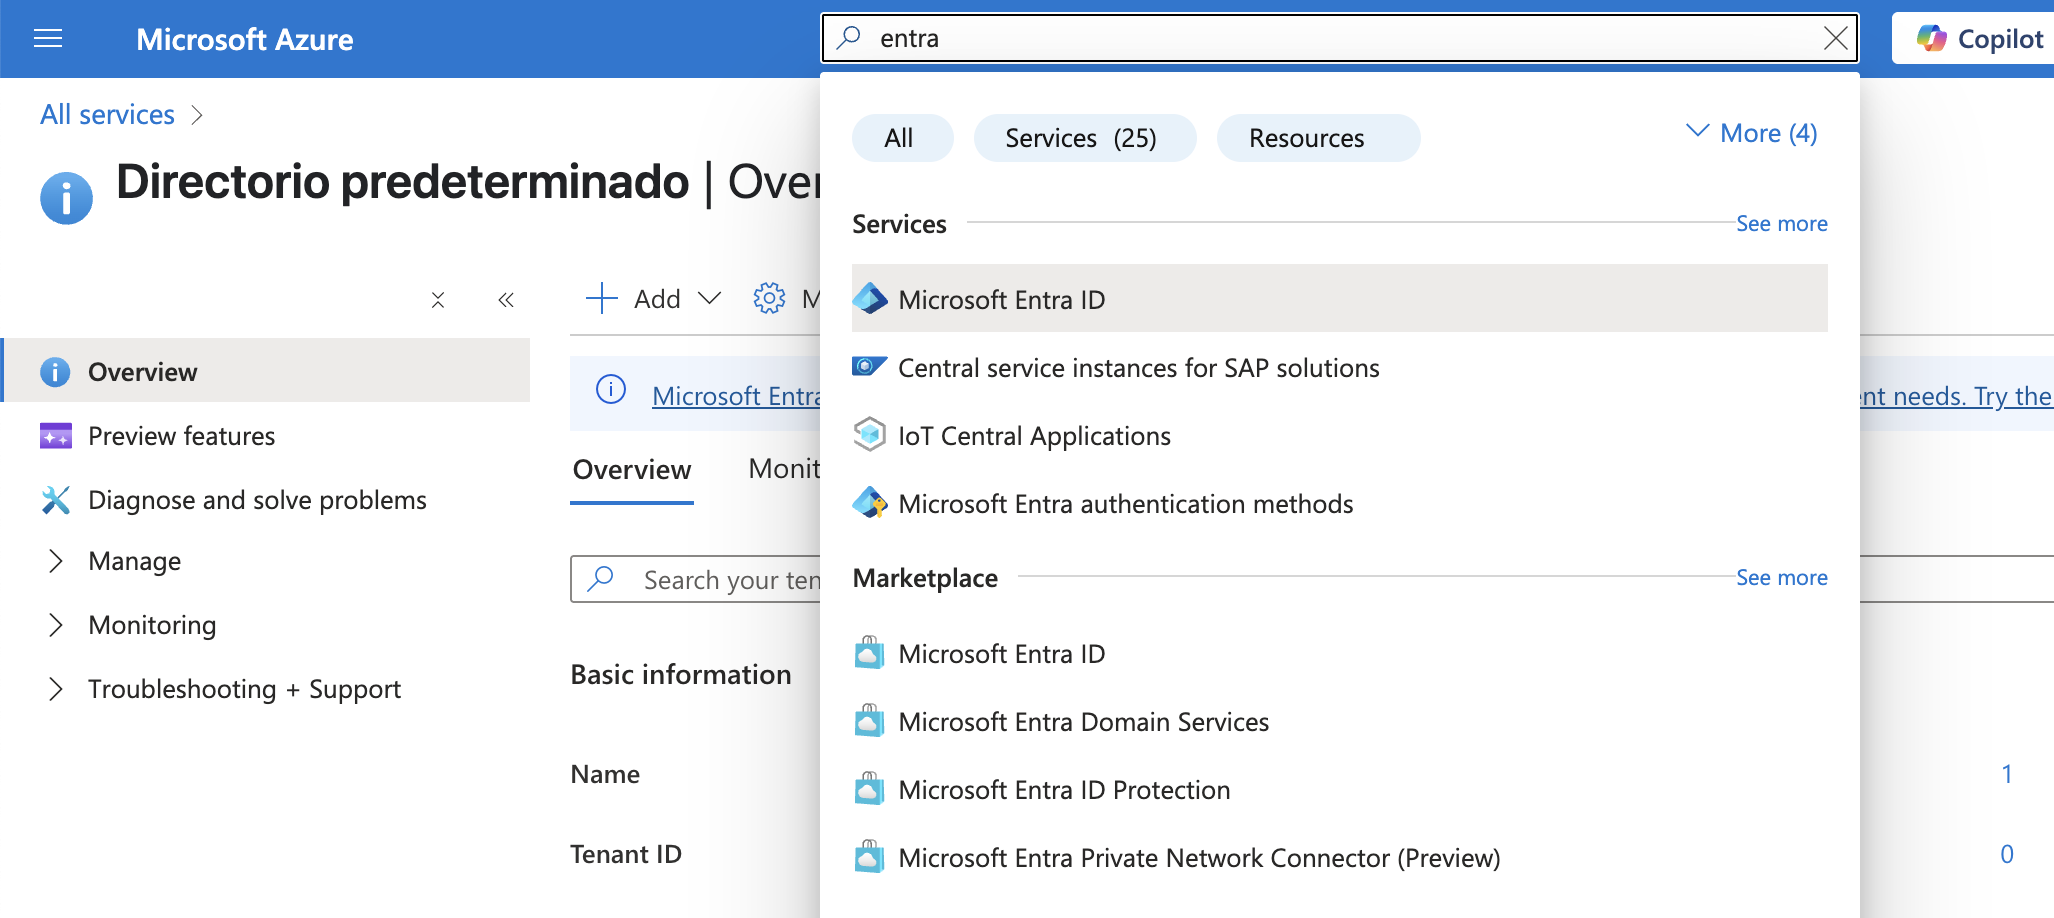
Once logged in, navigate to your Azure Portal if not automatically redirected. - Search for Microsoft Entra ID
In the search bar at the top of the page, type “Entra” and select Microsoft Entra ID.
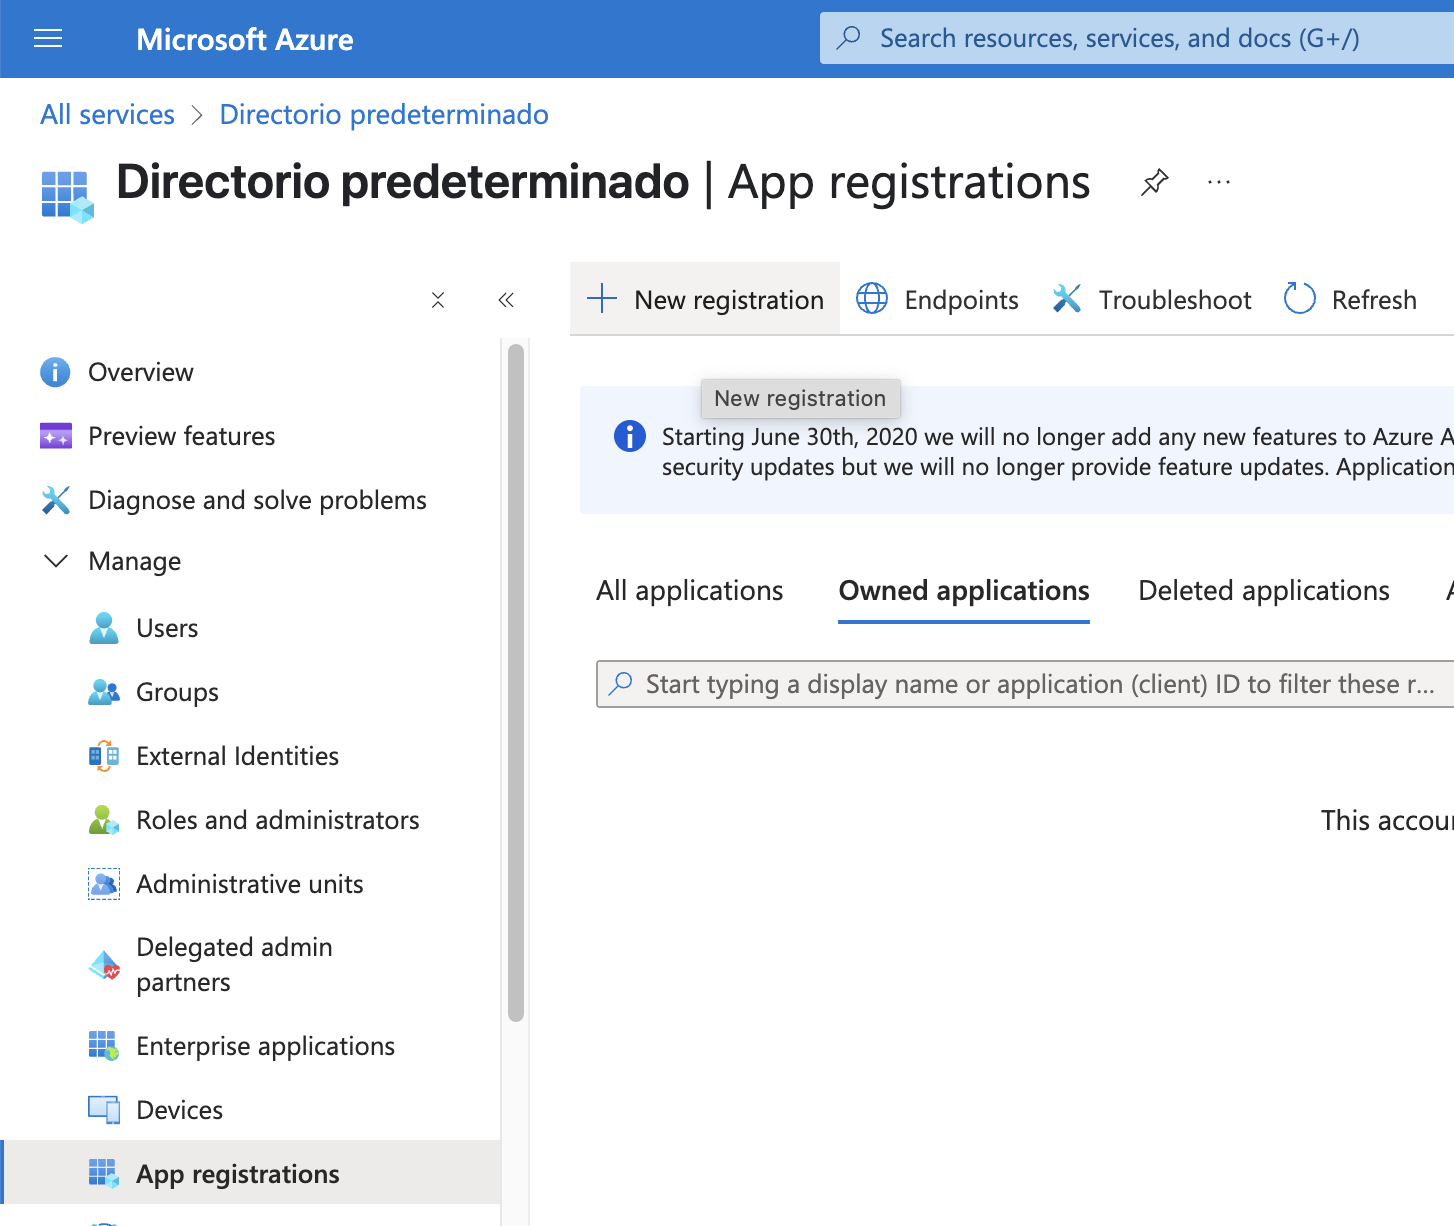
- Create a New App. Click on Manage > App registrations > + New registration button.
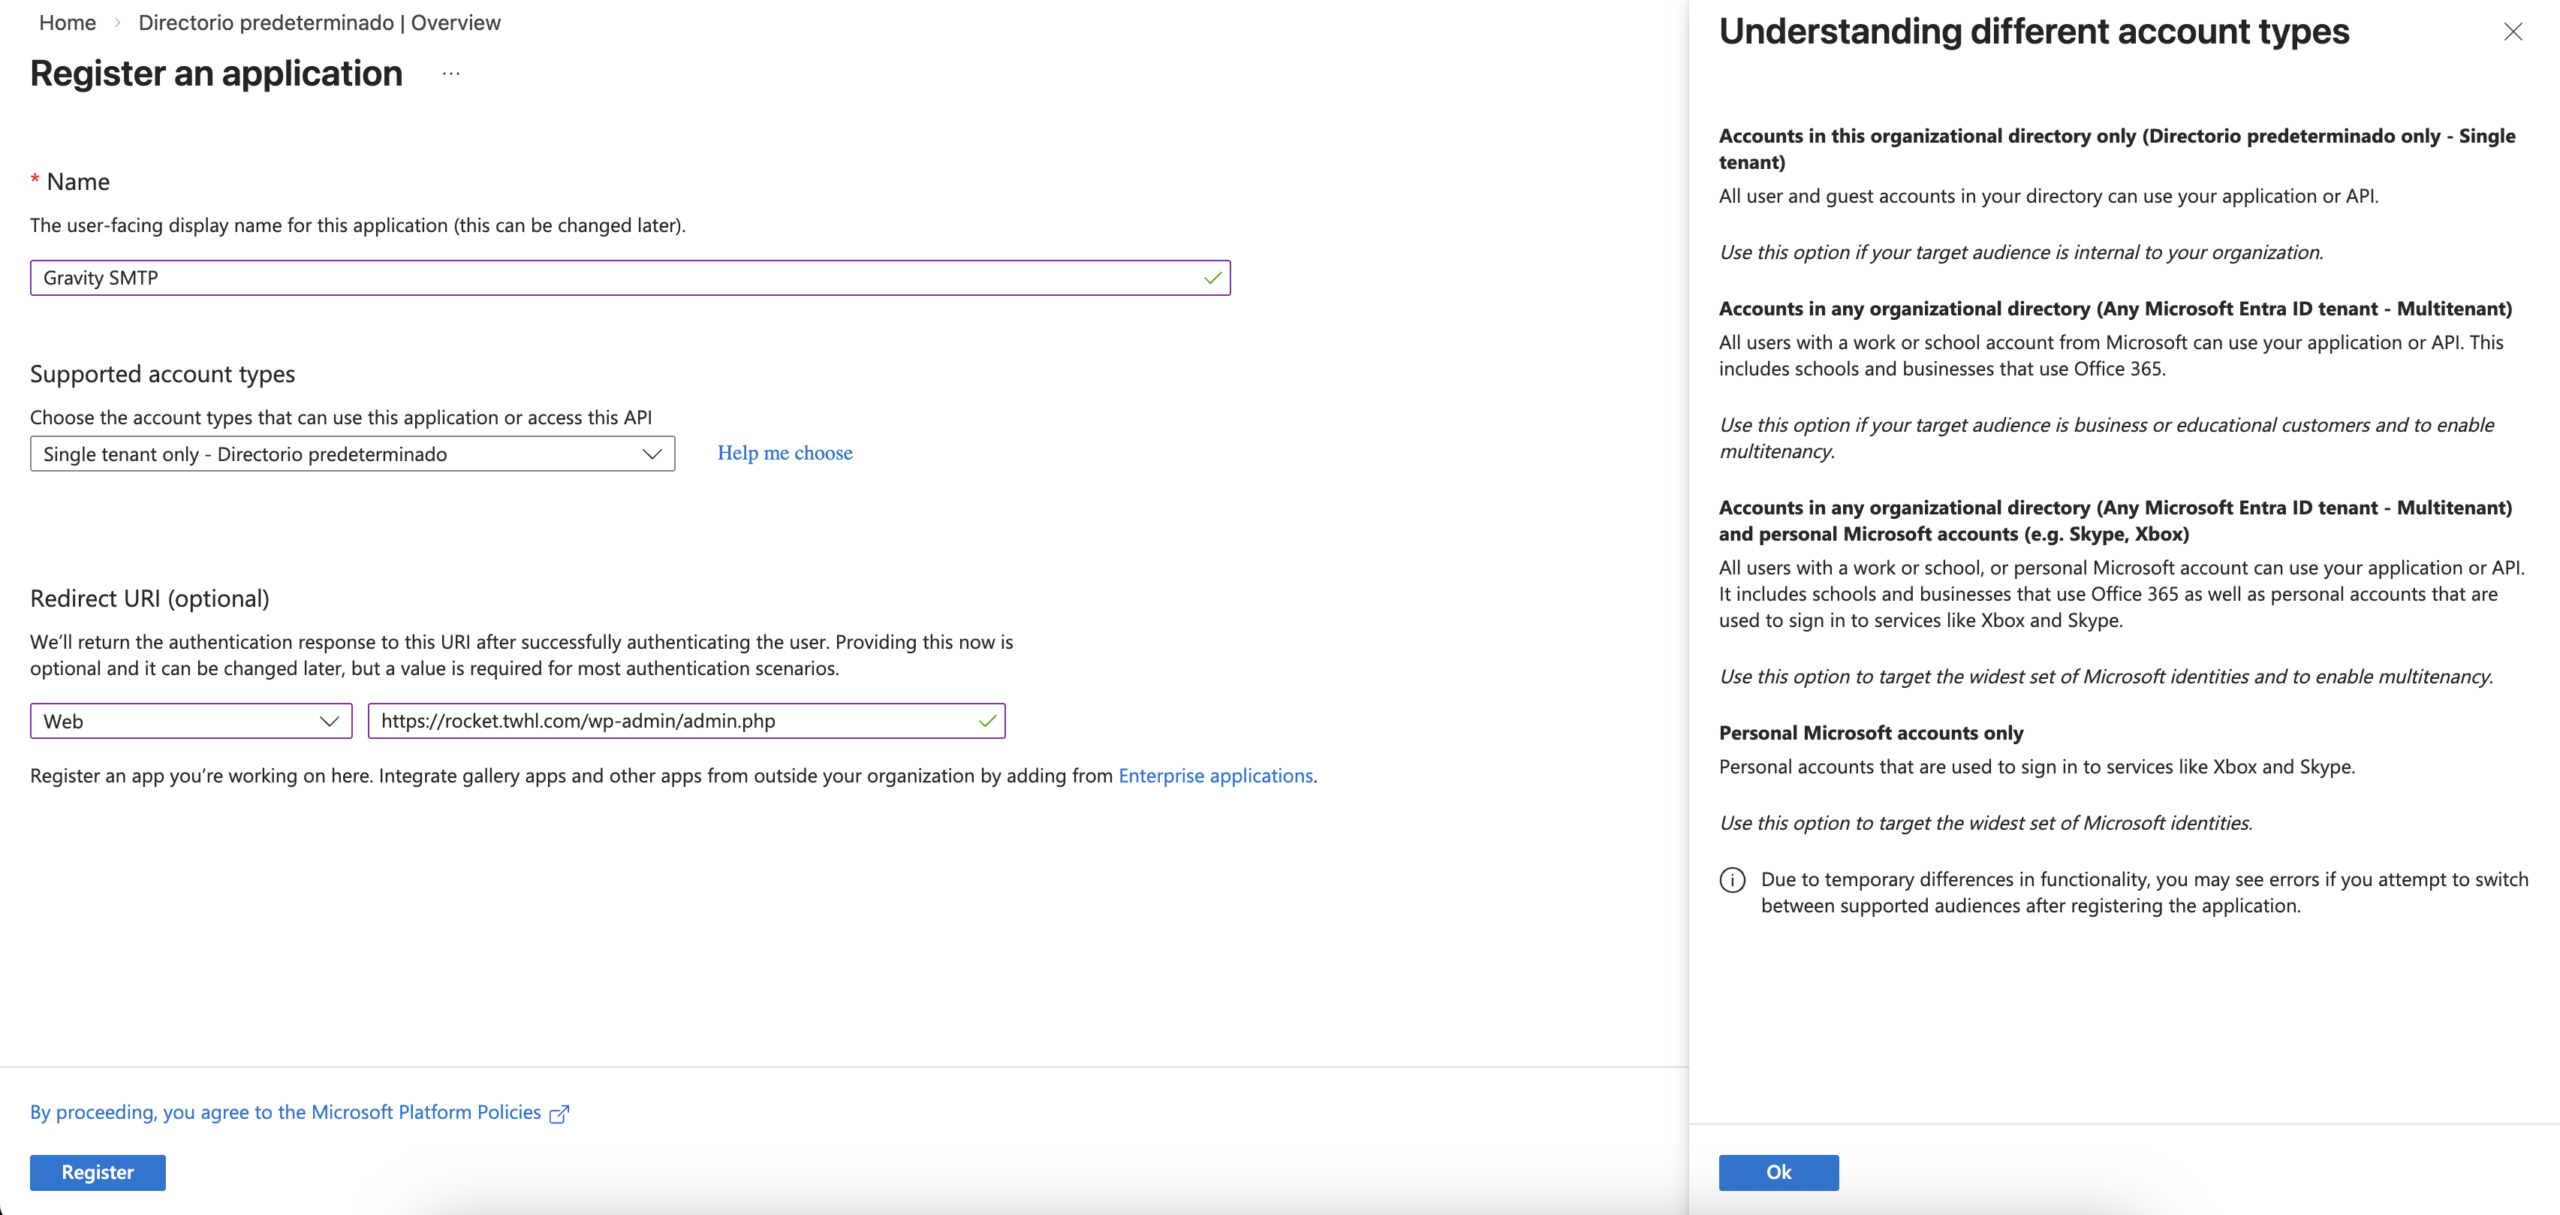
- Fill Out the Registration Form.
Complete registration according to the account type (personal or school/work).
– Name.
Enter a name for the app, e.g., “Gravity SMTP”.
– Set Supported Account Types.
Personal Account. Select “Accounts in any organizational directory (Any Microsoft Entra ID tenant – Multitenant) and personal Microsoft accounts (e.g. Skype, Xbox)”.
School or Work Account. Select “Accounts in any organizational directory (Any Microsoft Entra ID tenant – Multitenant)”.
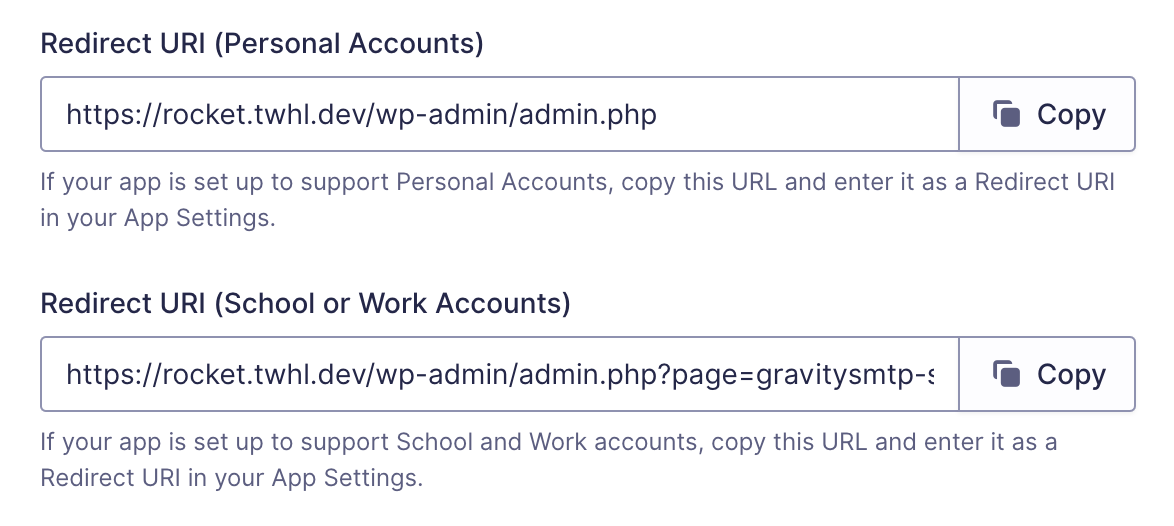
– Redirect URI.
For the first dropdown, set to “Web”. For the second field, copy/paste the value from your Gravity SMTP settings (found under the Outlook / 365 section in the Redirect URI field). Be sure to use the Redirect URI specific to your account type.
- Register the Application.
Click the Register button to proceed. - Verify Settings: After registration, go to the “Authentication” tab to double-check the “Supported account types” and “Redirect URI”. Ensure these are correctly configured.
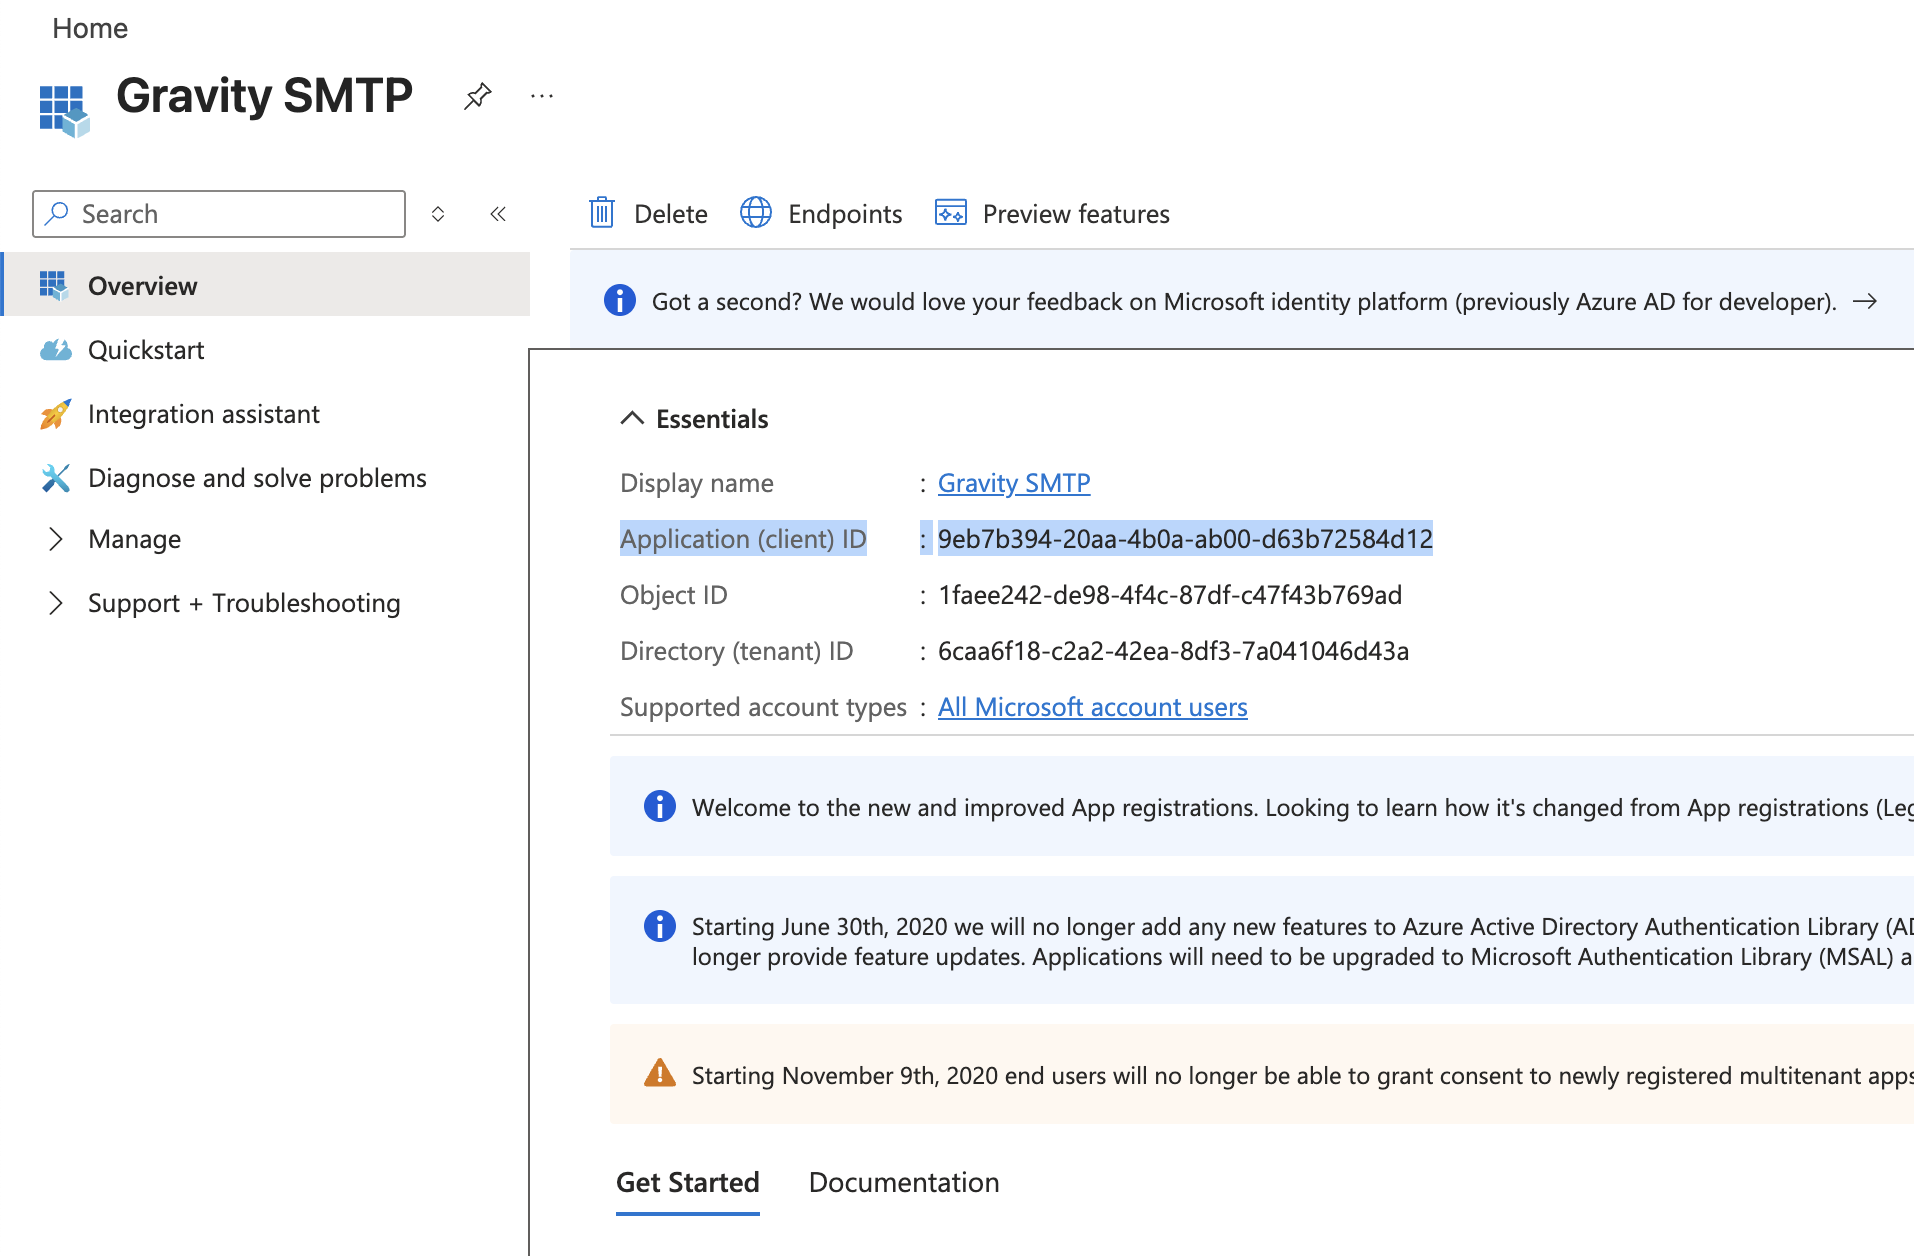
Step 3: Copy Application (Client) ID
- After registration, you’ll be redirected to the Overview page.
- Copy Application ID.
Find and copy your Application (client) ID from the Overview page. You will need this value later for the Gravity SMTP settings in the Application ID field.
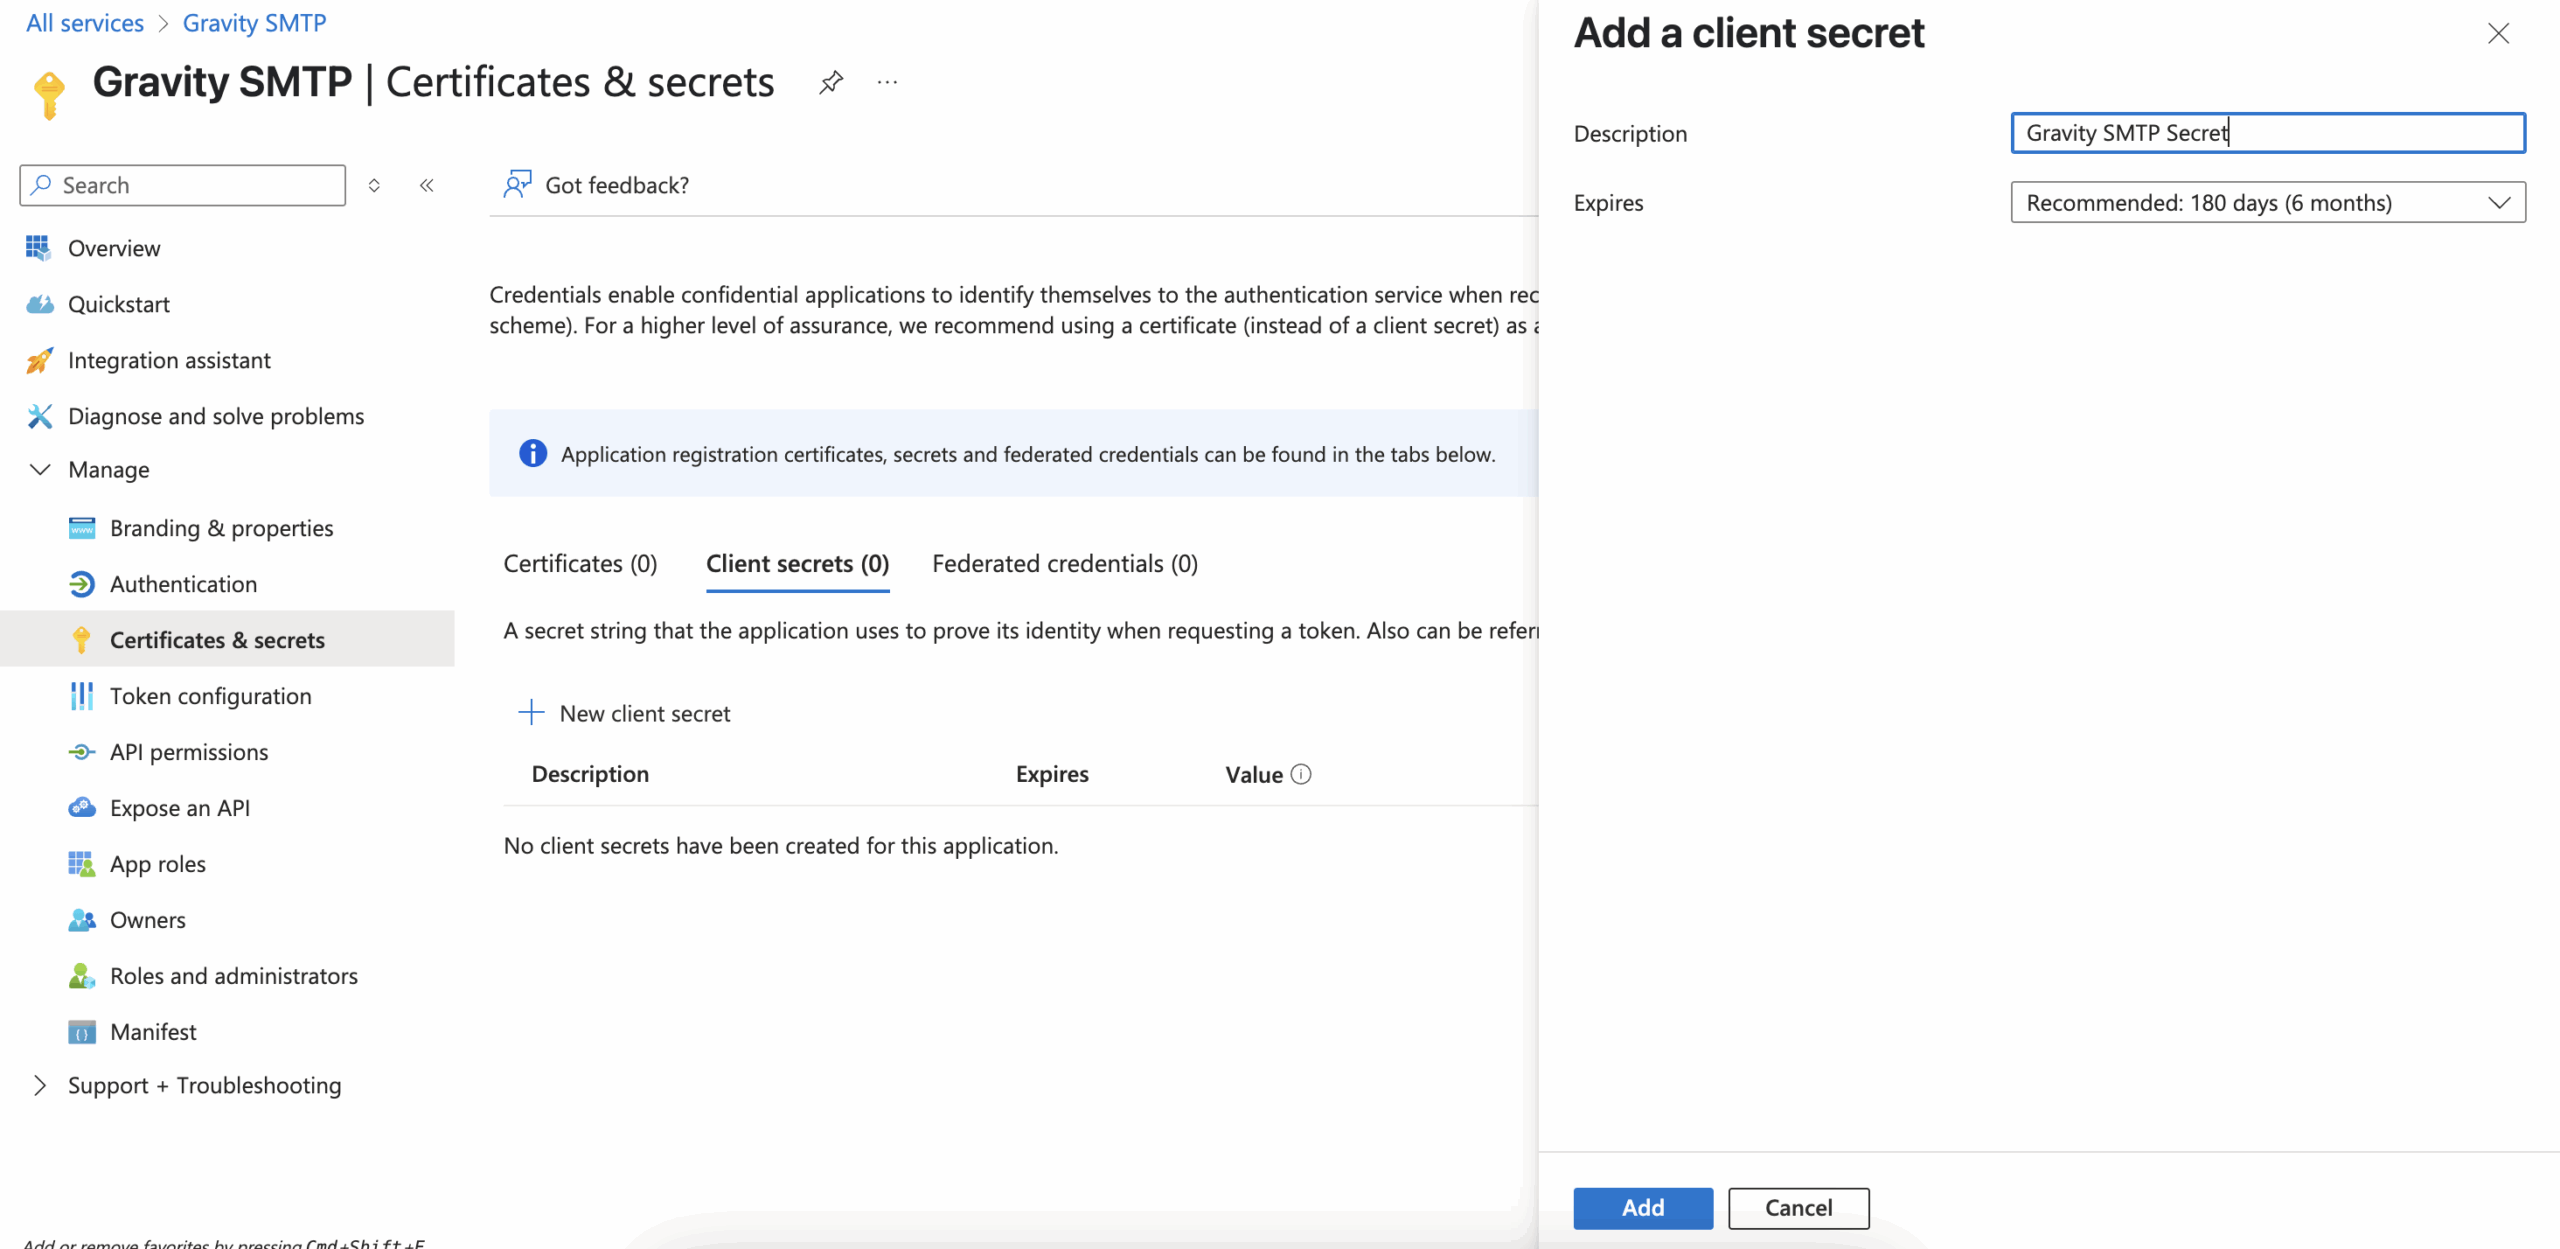
Step 4: Create an Application Password
- Navigate to Certificates & Secrets.
In the left sidebar, click on “Certificates & secrets”. - Create a New Client Secret.
Click on “+ New client secret”. - Fill out the form with the following details:
– Description.
Enter a name, e.g, “gravity_smtp_password”.
– Expires
Select “180 days (6 months)”. - Get Your Application Password
Copy the password from the “Value” column (not the Secret ID column).
Store this value securely, as it will not be accessible after you leave the page. You will need this value later for the Gravity SMTP settings in the Client Secret field.
Supported Account Types
When configuring an app to connect with Gravity SMTP, you must choose either personal accounts or work/school accounts.
Gravity SMTP does not support handling both simultaneously. To ensure the app is configured for use by work/school accounts, follow these steps:
- Go to Manage → Manifest in the app.
- Find the
signInAudienceproperty and change it toAzureADMultipleOrgs. - Save the Manifest.
- Return to the Authentication section and ensure that the Supported account types is set to “Accounts in any organizational directory (Any Microsoft Entra ID tenant – Multitenant).”
- Add the associated Redirect URI (with query string parameters) from Gravity SMTP into the app again.
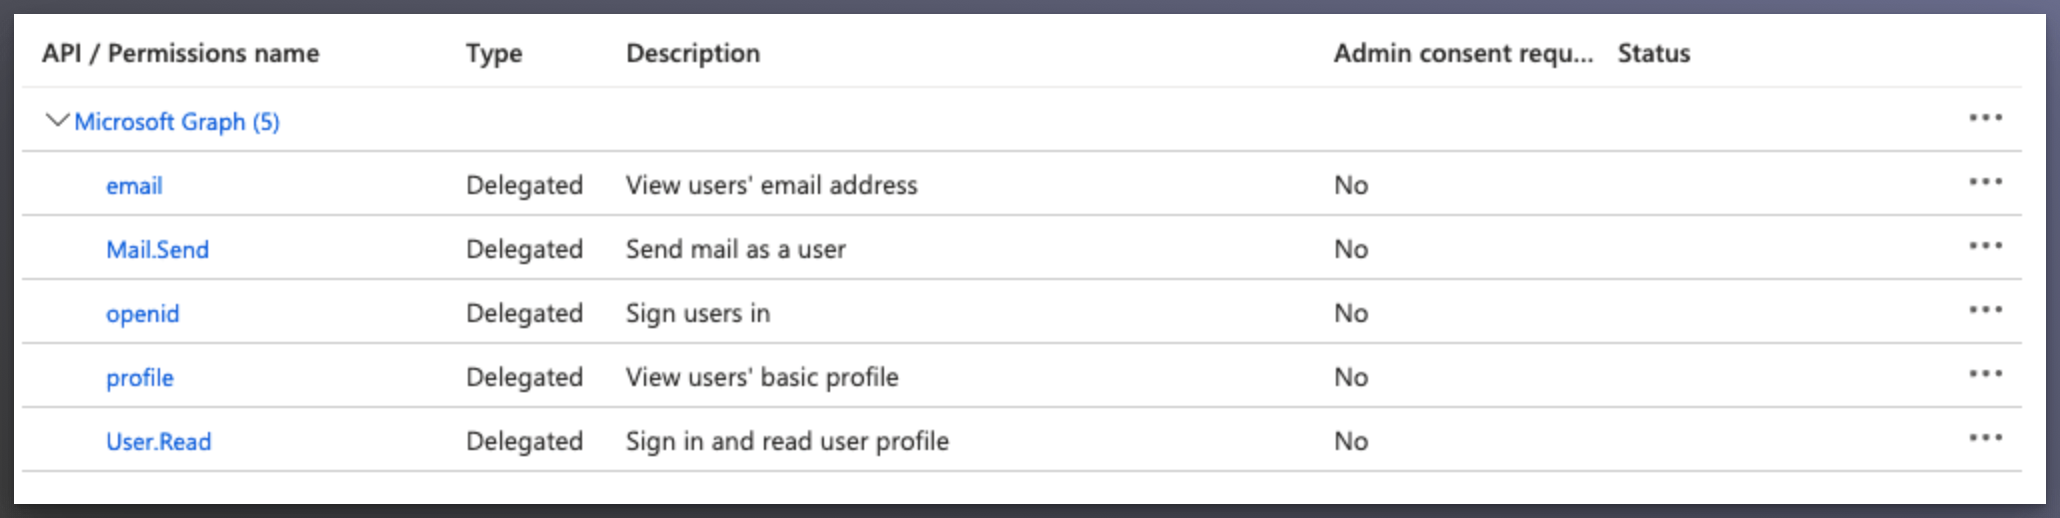
API & Permission
The following APIs and Permissions must be enabled in the App