Introduction
Adding and verifying a domain from within your Postmark account is required in order to prove ownership of the domain from which outgoing messages will be sent. You must complete this step before configuring the Postmark Integration within Gravity SMTP. This article outlines steps for both adding and verifying a domain in your Postmark account. Reference Postmark’s official documentation How do I verify a domain? for more info and related articles.
Note that while Postmark allows for individual sender signatures, domain verification is the preferred method of authorizing senders.
Authenticating a New Domain
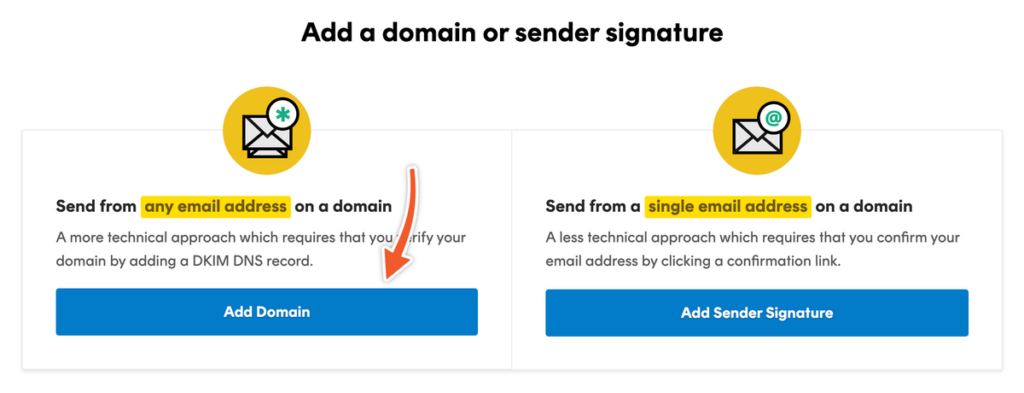
From within your Postmark account, navigate to Sender Signatures and click Add Domain or Signature.

Next, select Add Domain.
You will be prompted to add a new domain. This must be a domain you own.
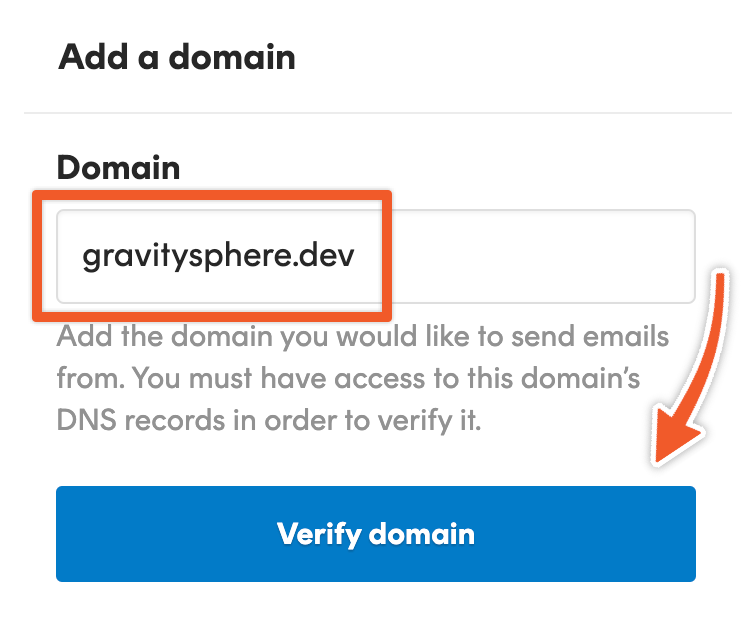
Enter a domain name for the handling of emails via Postmark and click Verify domain. Postmark will generate DNS records for use with this domain and show verification instructions.
Verifying Your New Domain
In order to verify ownership of your domain and enable use of this domain with Postmark, you will need to add multiple DNS records for the domain you have just added. Postmark will run verification against these DNS records. Your next step is to visit your DNS provider for the domain and add each DNS record provided by Postmark.
Adding DNS Records
DKIM (DomainKeys Identified Mail) records for sending exist as a TXT record and are used to authenticate emails, confirming messages are actually from the domain they claim to be from and have not been tampered with during transmission. This enhances email security, mitigates the risk of email spoofing, and increases the likelihood of legitimate emails reaching their intended recipients.
| Type | Hostname | Value/Content | TTL |
|---|---|---|---|
TXT | This hostname will be unique. | This value will be unique. | 3600 |
CNAME (Canonical Name) records map an alias name to a true or canonical domain name. They’re used to link a subdomain to another domain name, allowing requests made to the alias to be routed to the correct server or site.
| Type | Hostname | Value/Target Name | TTL |
|---|---|---|---|
CNAME | pm-bounces | pm.mtasv.net | 3600 |
Verifying DNS Settings
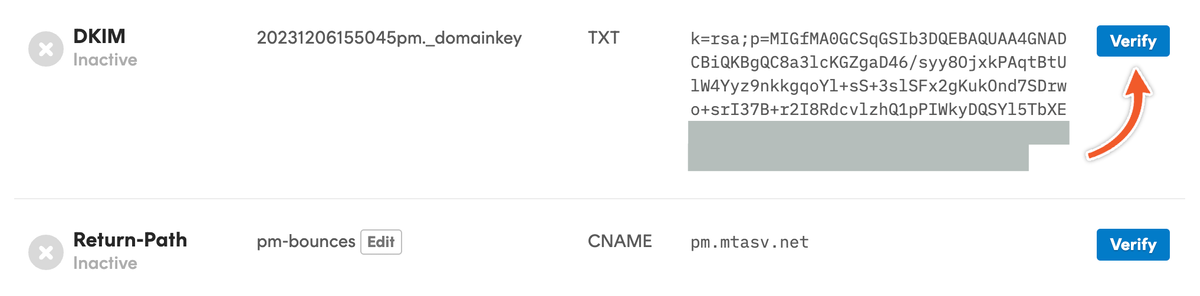
After having added all DNS records for the domain, you will then click the Verify button next to each record. Postmark will then check for your new DNS records in order to authenticate the domain for sending. Note that it may take some time for DNS records to propagate.
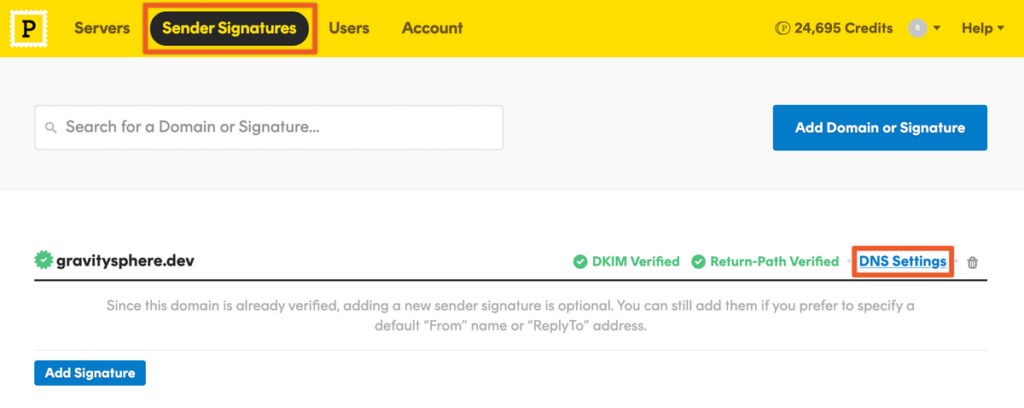
You can view the status of your domain verification by returning to Sender Signatures within your Postmark account. DNS records for a domain can be accessed by clicking into DNS Settings for a specific domain.
Once all records are verified, you are ready to get your Server API token.