

Introduction
The Gravity SMTP email log provides a quick way to view messages sent from your website without leaving your WordPress dashboard.
Accessing the Email Log
Gravity SMTP Email logging is enabled by default. To enable or disable it, visit SMTP → Settings → Logging.
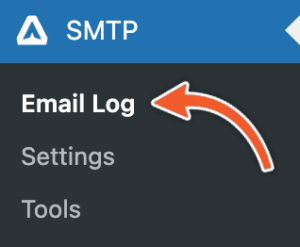
To view the Gravity SMTP email log, hover over the SMTP menu item, then choose Email Log:
Viewing the Email Log
The Gravity SMTP Email Log shows each email sent from your website. The emails are displayed in reverse chronological order, meaning the most recently sent messages are shown first.
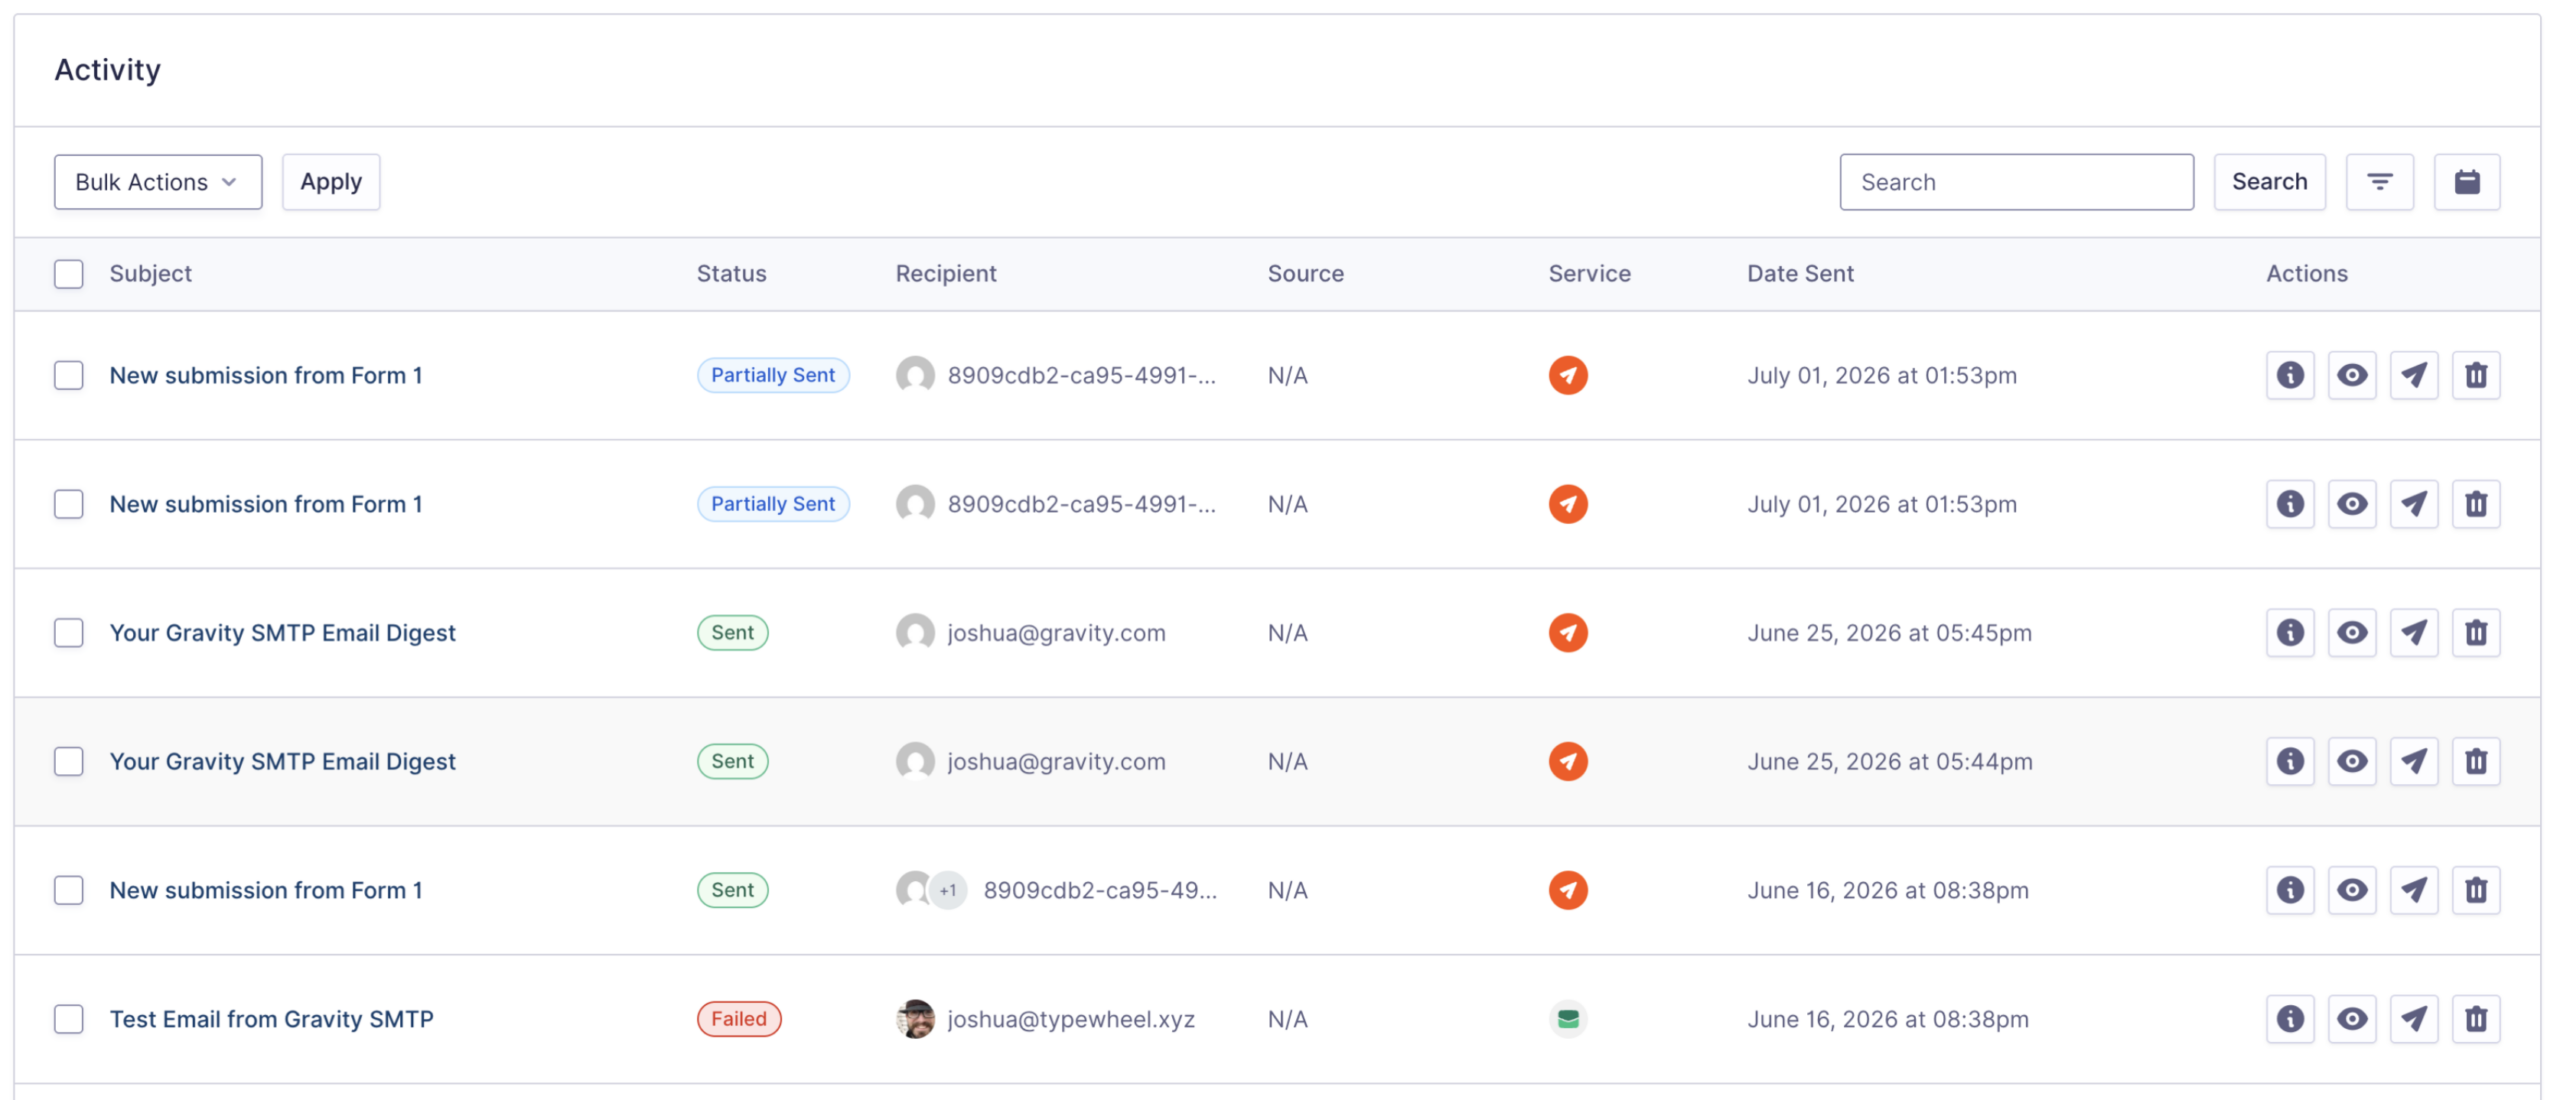
| Column | Description |
|---|---|
| Subject | The email subject used. |
| Status | The current status of the email. Sent: Email sent to all recipients. Filtered: Email sent to valid recipients; one or more addresses were removed due to suppression. Pending: The email is currently waiting to be sent. Failed: Email failed to be sent. Sandboxed: Email is sandboxed and not delivered. Suppressed: All recipients were on a suppression list; email not sent. |
| Recipient | Shows the first recipient and the associated avatar. |
| Source | The source that originated the email. For more information on sources, refer to the Dashboard article. |
| Service | The Integration used for sending the email. |
| Date Sent | The date and time the message was created. |
| Actions | eye icon: view the log details for this email. envelope icon: view the email message. paper plane icon: resend the email message. trash can icon: delete the entry for this email from the log. Refer to the Log Entry Actions. |
Searching And Filtering Email Logs
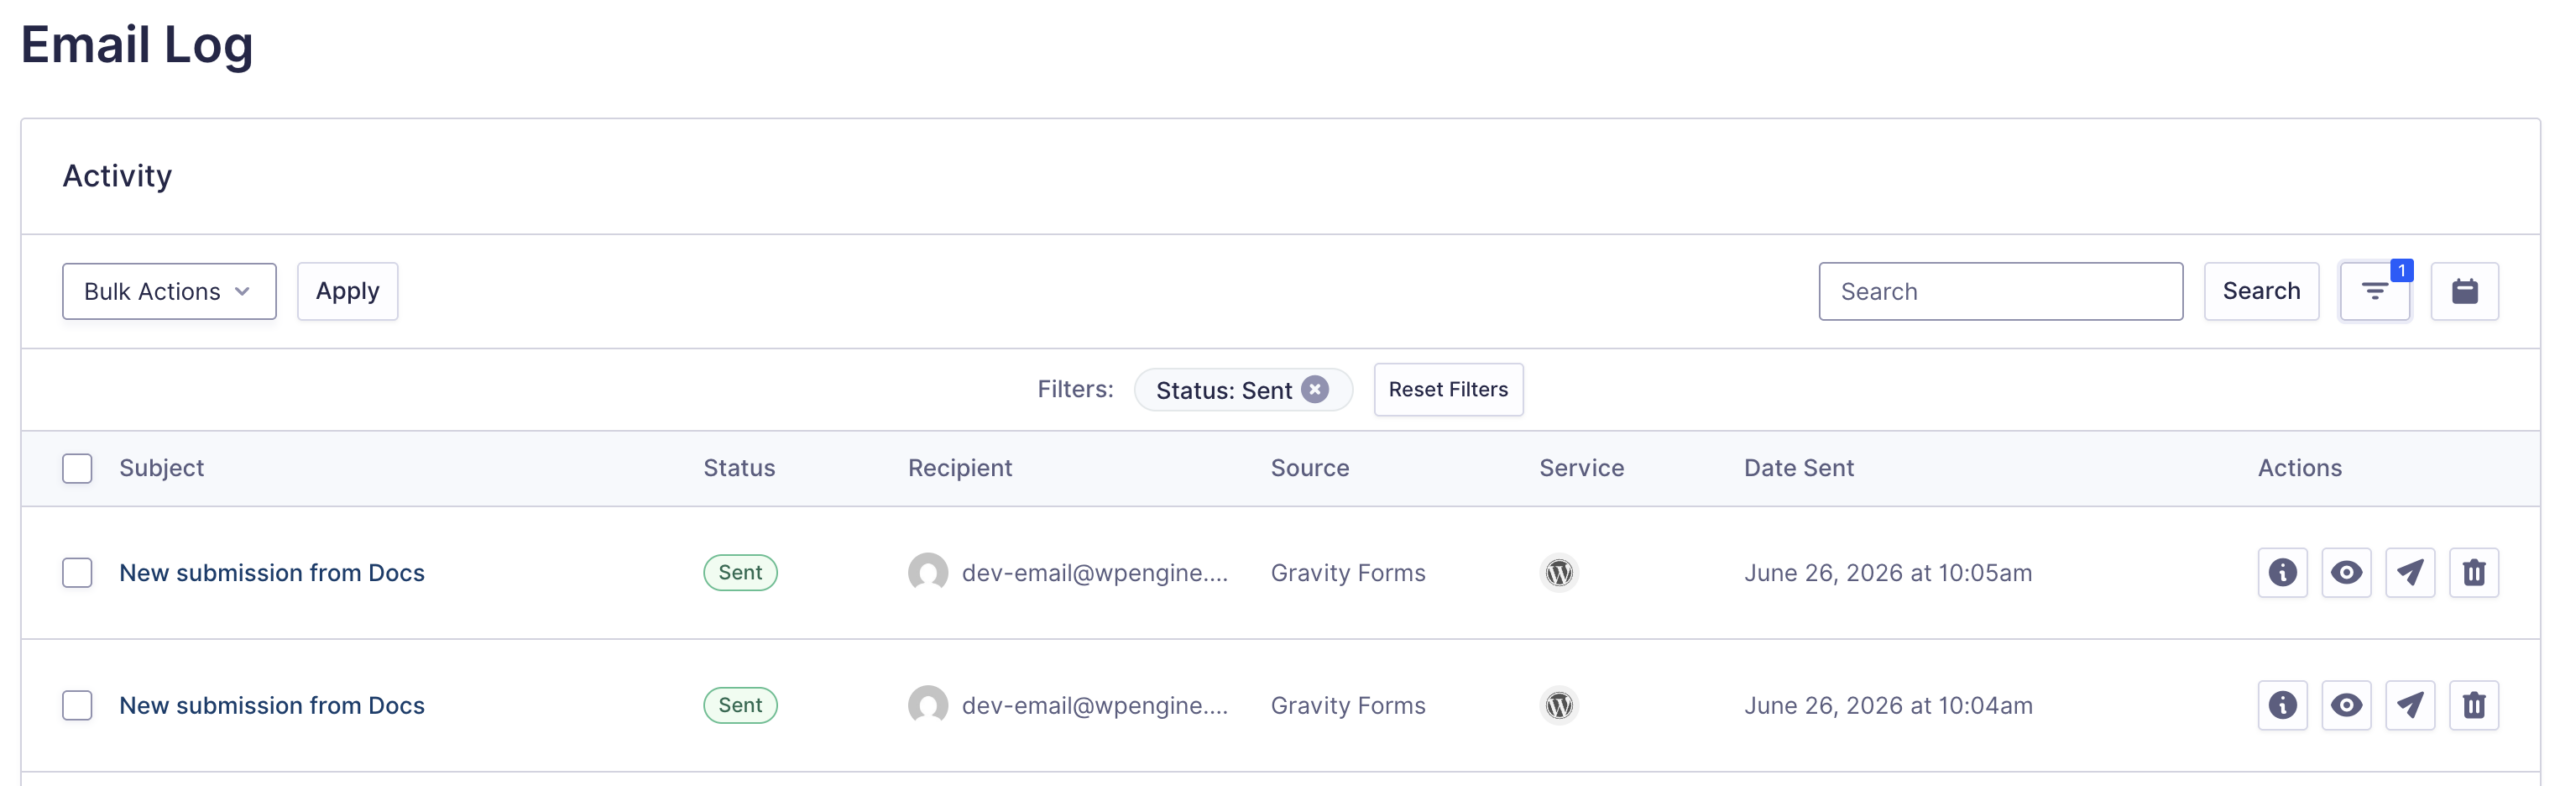
The email log entries can be searched and filtered by using the search bar and the filters in the upper right corner of the Email Log page.
| Column | Description |
|---|---|
| Search | The search will match any entered text against the email data of sender, recipient, subject, and body text. Search is case-insensitive. |
| Filter | Allows you to filter by Status (Sent, Filtered, Pending, Failed, Suppressed, Sandboxed), Service, and or Source. |
| Date Filter | Allows you to filter by a date range. |
| Reset Filters | Allows you to reset the current filters and show all entries. |
Log Entry Actions
The Actions column on the right side of each log entry in the Log view provides the following three quick actions for each entry. These actions are also available from the log entry detail page.
- eye icon: view the log details for this email.
- envelope icon: view the email message.
- paper plane icon: resend the email message.
- trash can icon: delete the entry for this email from the log.
Each of these actions is detailed in the following sections.
Viewing Entry Log Details

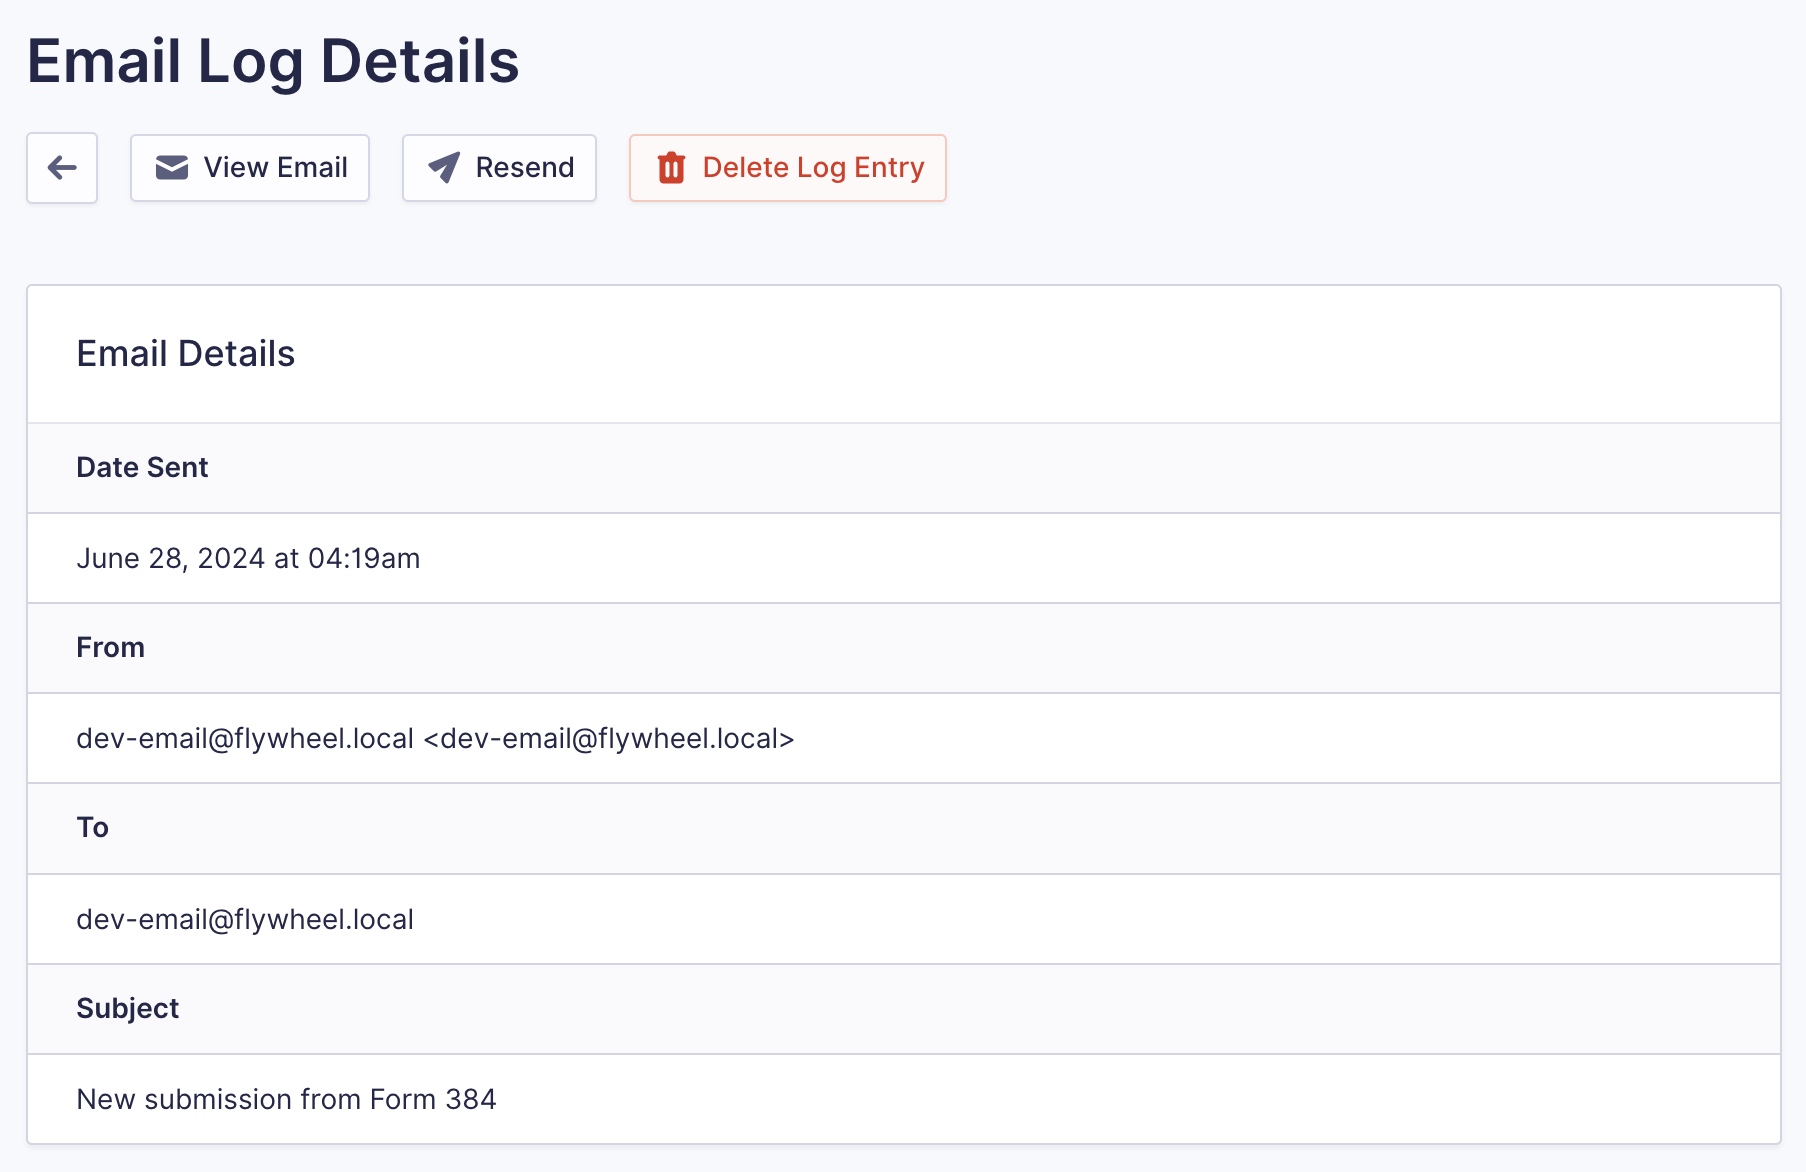
Clicking the eye icon next to an item on the main Email Log screen opens a new screen that displays more details about the entry.
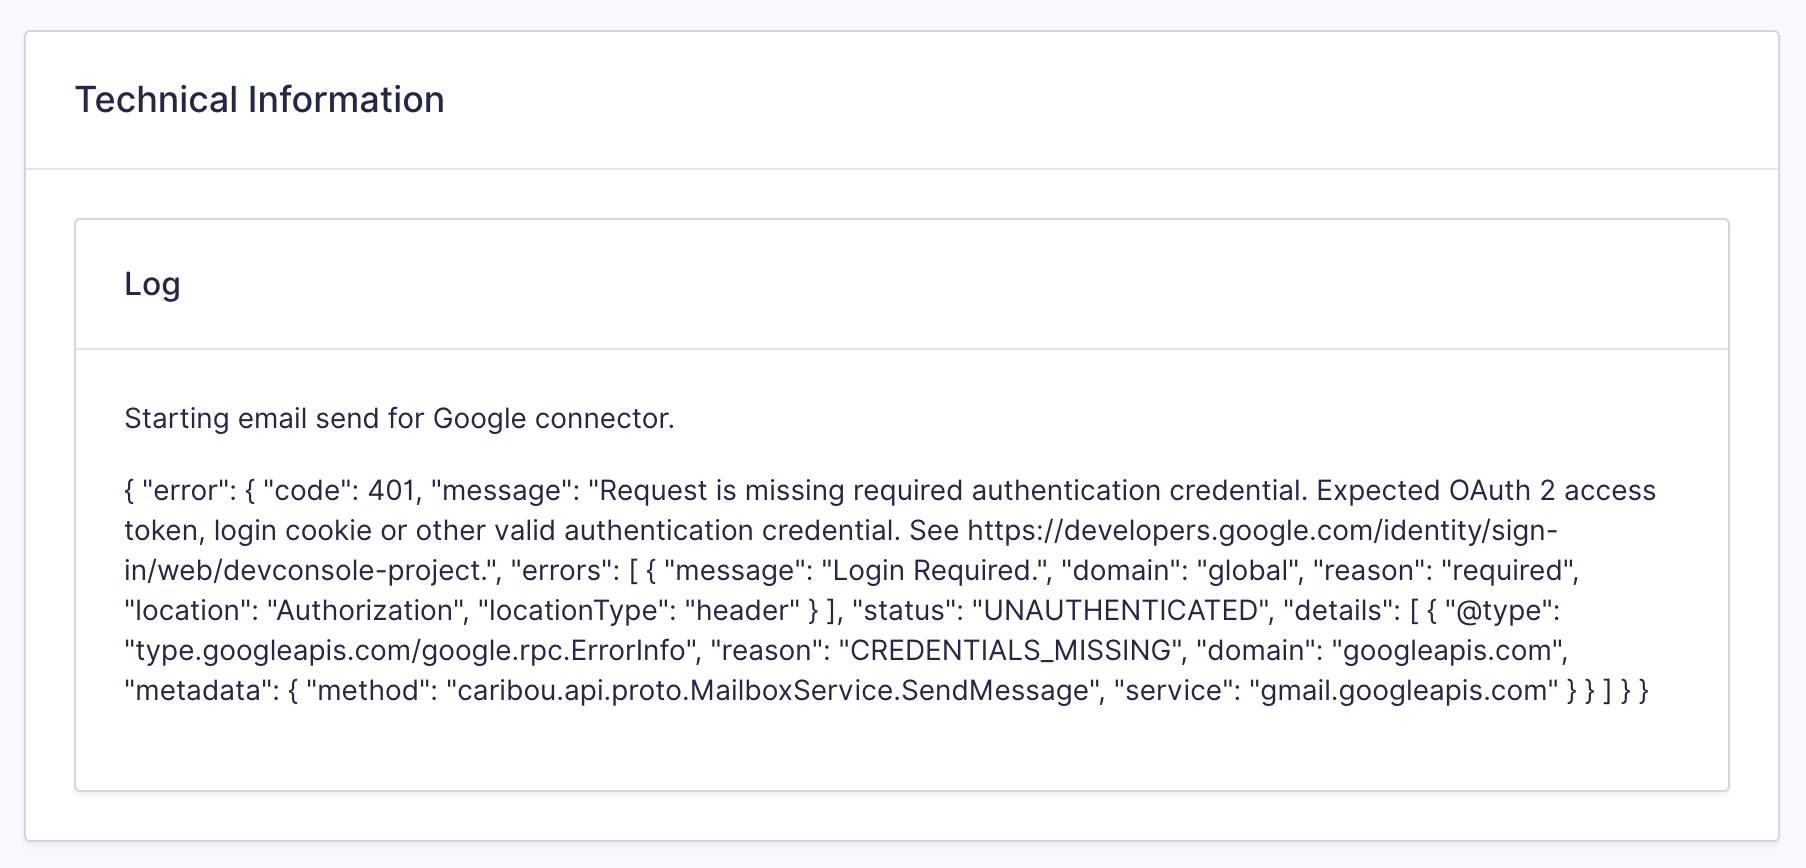
Here, you can view the logged technical details of this message’s sending process. The details shown may vary based on the integration used to send the message. You can also click the View Email button at the top of the detail view to preview the email that was sent, the Resend button to resend the email, or the Delete Log button to delete this entry from the log completely.
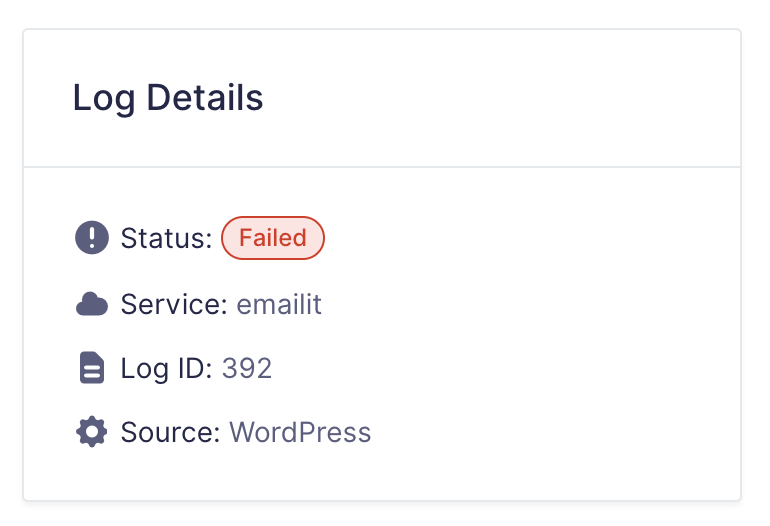
The Log Details box on the right side of the screen shows the message status, the service used to send the message, the Log ID, and the Source (if applicable).
| Setting | Description |
|---|---|
| Status | The current status of the email. Sent: Email sent to all recipients. Partially Sent: Email sent to valid recipients; one or more addresses were removed due to suppression. Pending: The email is awaiting sending. Failed: Email failed to be sent. Sandboxed: Email is sandboxed and not delivered. Suppressed: All recipients were on a suppression list; email not sent. |
| Service | The Integration used for sending the email. |
| Log ID | The ID of the current log entry. |
| Source | The source that originated the email. For more information on sources, refer to the Dashboard article. |
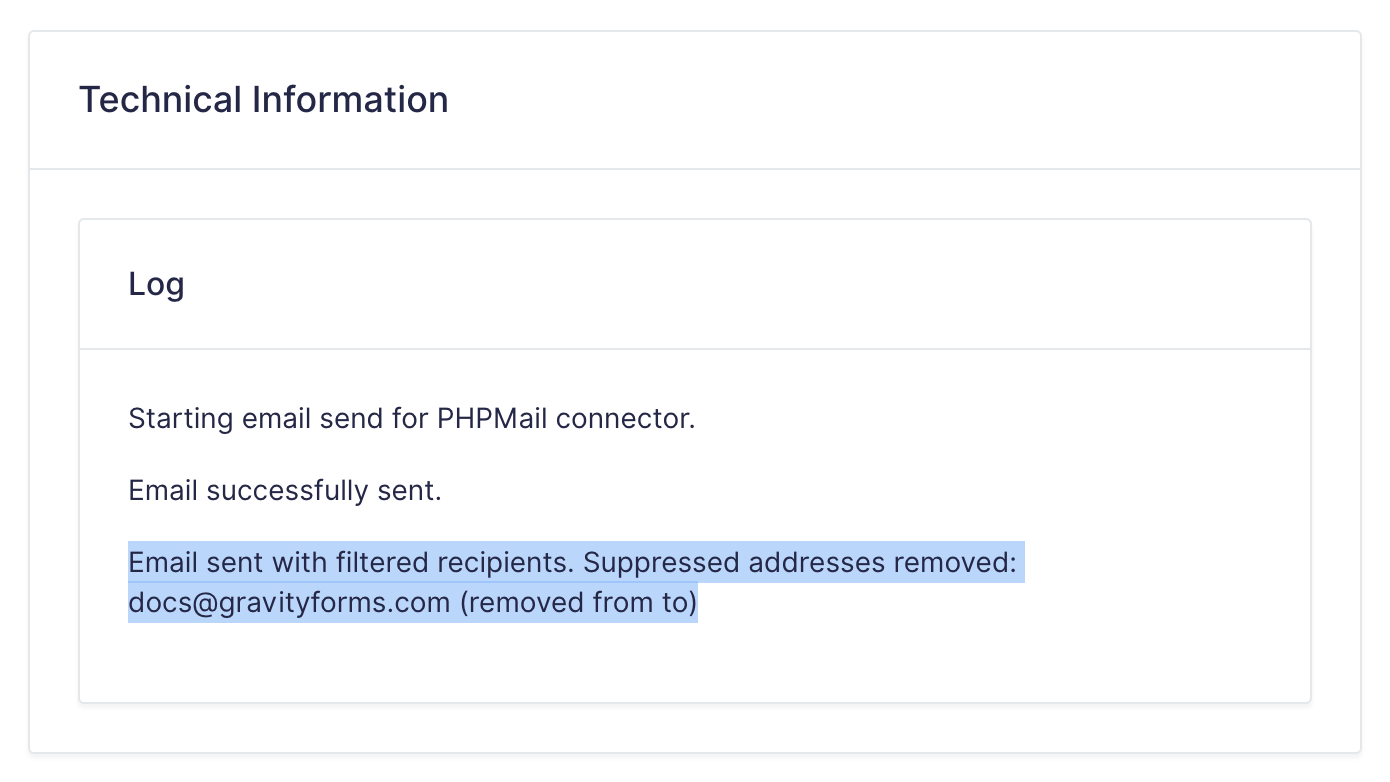
Note: For emails with a Filtered status, suppressed addresses are logged with a “removed” indicator showing which field (To, CC, or BCC) they were removed from. For example: [email protected] (removed from CC).
Viewing the Email

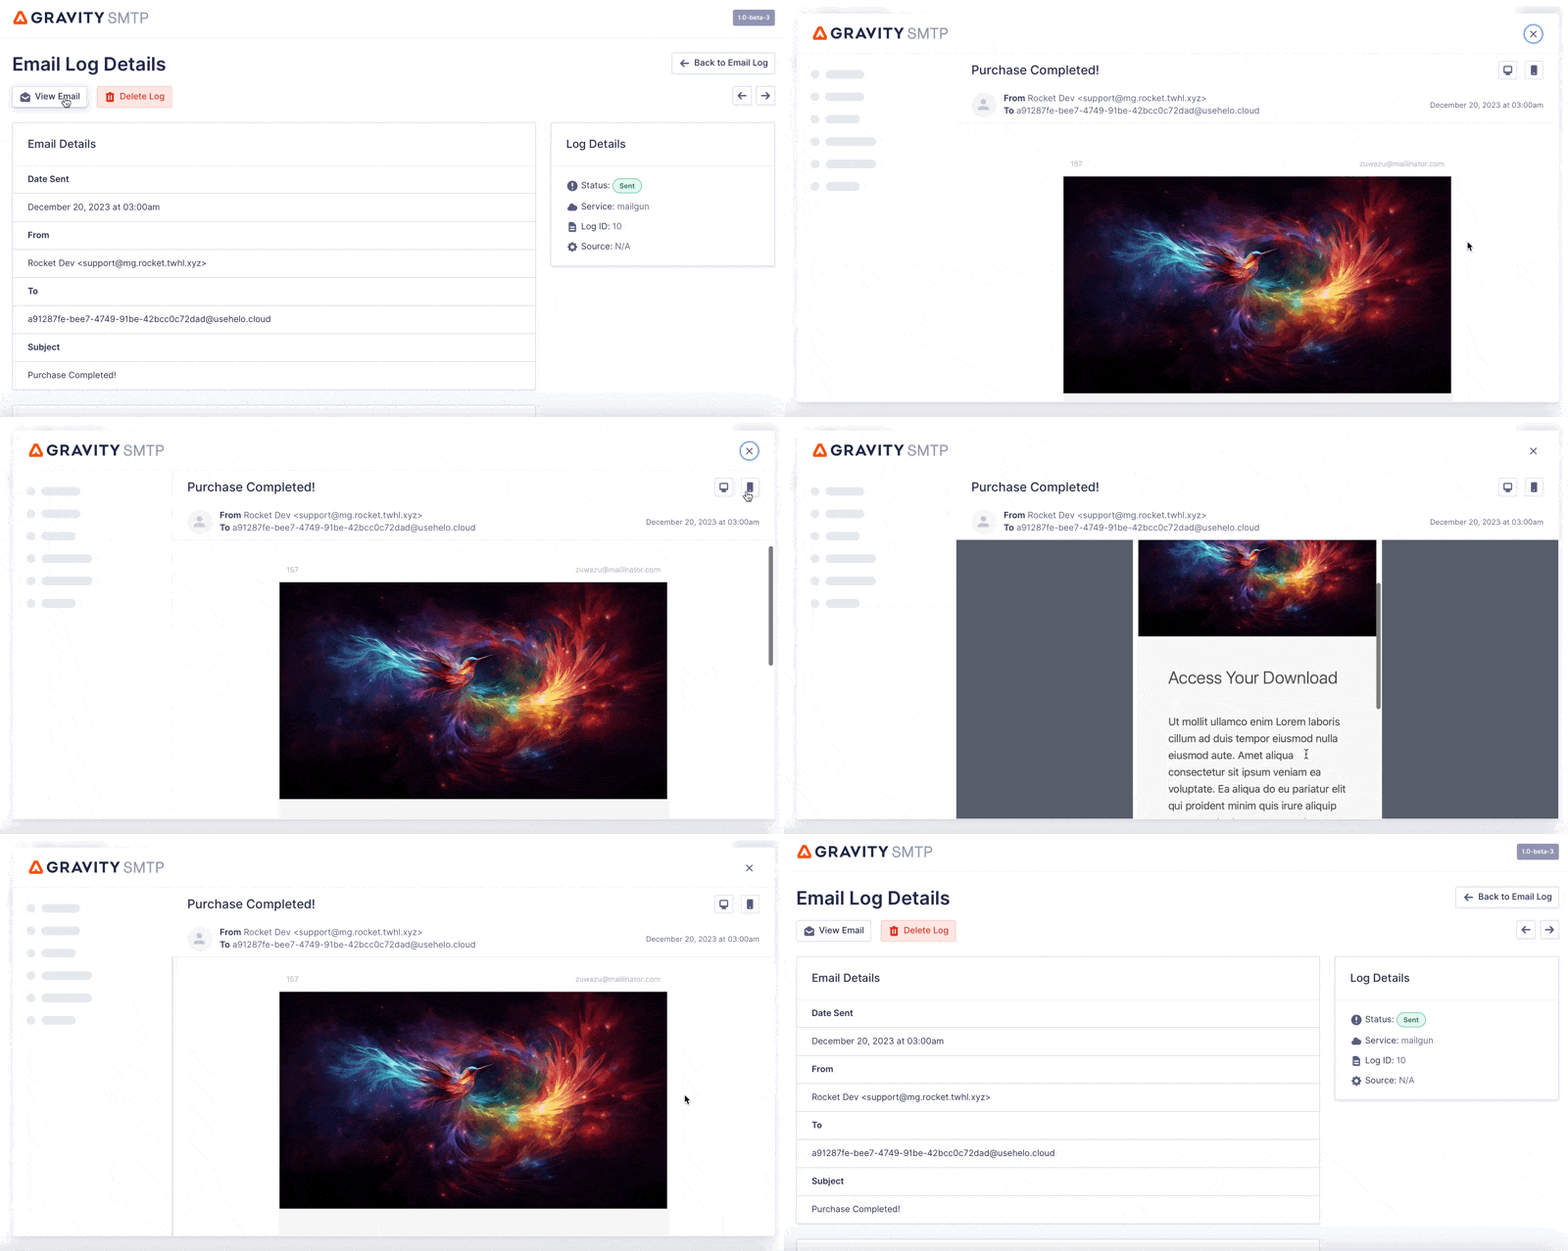
To view the email related to the log entry, click the View Email button from the Email Log Details screen or the envelope icon shown for any row in the Email Log.
Viewing opens a modal window with the message content, and options in the top-right corner let you switch the preview to desktop or mobile view.
Resending the Email Log Message

Click the paper plane icon in the Email Log to resend an email. Confirm the action that appears in the dialog to resend the email.
Deleting the Email Log Entry

To delete a log entry, click the Delete Log button from the Email Log Details screen or the Trash icon on any row in the Email Log. Deletion will show a confirmation dialog and, once approved, is permanent with no recovery option.
Log entries can be deleted in bulk by ticking one or more checkboxes to the left of each item, selecting Delete from the Bulk Actions dropdown, and then clicking Apply.